What Is the Plot of the Hobbit There and Back Again
Plot your pictures
Information technology'southward easy to add together a diverseness of elements to a movie poster through portraiture, color schemes and composition. This could go some way to explaining why greater numbers of movie posters and DVD covers are being illustrated.
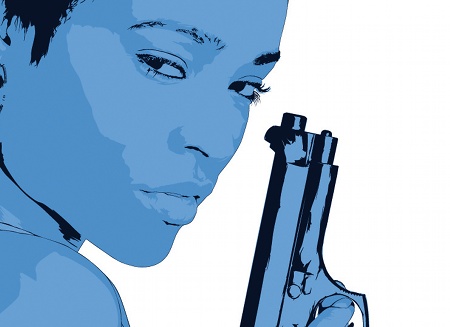
Graphic illustration is a not bad way to inject a different look into a picture affiche while even so having a potent sense of realism. The master aim of this project is to use illustration to create a pic poster that's dissimilar. Take this opportunity to create an epitome that has your personal postage all over it and ticks all the boxes in regards to having elements of realism as well as stiff testify of the movie's plot.
Illustrator and Photoshop enable u.s.a. to swiftly compose and create illustrations in somewhat unusual colour schemes, and ones that are too full of energy. In this tutorial I'm going to show you how to create a graphic activeness flick poster that draws people in and also gives a sense of the plot.

01 One time yous've sourced your images it'due south fourth dimension to put together a composition in Photoshop. To modify the colour of your movie characters, hitting Ctrl/ Cmd+U to open up the Hue/Saturation window. Click the Colorize tab and suit the sliders until you find a result that fits. Tape the Hue and Saturation values so yous tin can utilize these again to your other characters.
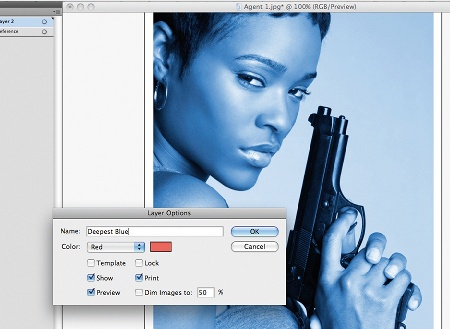
02 Cross over to Illustrator, open one of your reference files, lock it in the Layers palette and name it 'Reference'. To modify the colour mode to CMYK, go to File>Certificate Colour Mode>CMYK. Next create a new layer and name it 'Deepest Blueish'.
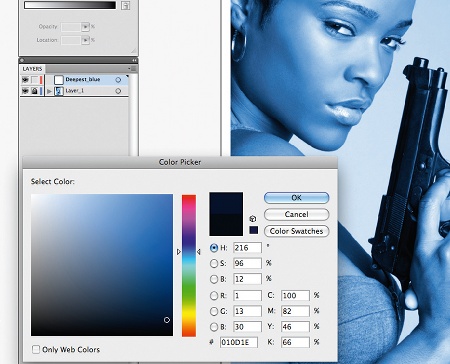
03 Set up the Color palette to CMYK by clicking the icon at the top right corner and selecting CMYK. So set the stroke to None and double-click on the make full colour. Set the fill up colour to a very dark blue, as above, and add it to your Swatch palette.
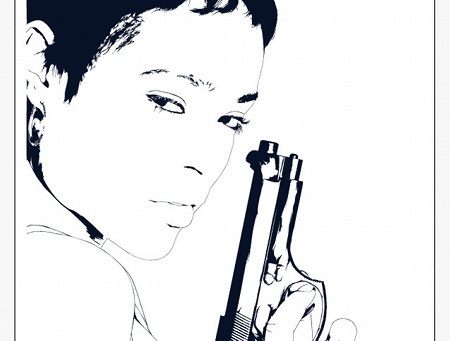
04 Select the Pen tool and begin cartoon all the darkest details - for example, the gun, pilus, eyebrows and outline features such as the nose and lips - with sparse lines. Before drawing your shapes, prepare Opacity to 10%. This way you tin encounter the photograph beneath while creating your shapes. Keep a check on how your image looks confronting the white sail.
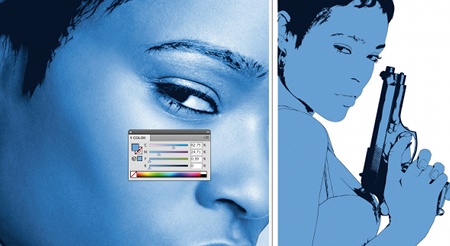
05 Use the Eyedropper tool to find a blueish that's in betwixt the lighter and darker tones, and elevate this colour to your Swatch palette. Now make a new layer called 'Skin Base' and place it to a higher place the 'reference' layer. Apply the Pen tool to depict a silhouette around the whole model. Depict shapes around any unwanted areas, then select them along with the silhouette and select the Minus Forepart icon in the Pathfinder palette.
06 It'due south time to add together detail. Create a new layer and telephone call it 'Lighter Shadow'. Apply the Eyedropper to pick the lightest shadow, and drag it to your Swatch palette. Then, with the Pen tool, depict shapes that highlight the lightest shadow areas. Follow the same procedure for the medium and darkest shadow areas.
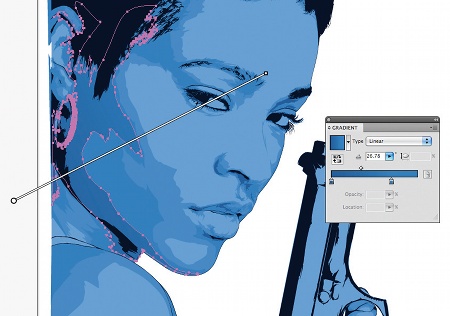
07 Every bit some areas go from darker to lighter, y'all tin use gradients to add a more realistic blend. Combine the darker color with the lighter blue you used on the layer beneath, then stretch and rotate a Linear Gradient until you've achieved an accurate colour blend. Use this method on other shapes if you feel information technology's needed; some shapes may require a Radial Gradient.
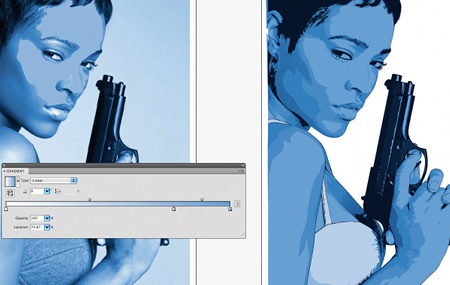
08 Utilise the same process to create the grapheme's gun and top. Now it'southward time to inject some light into the image. Create a new layer, name it 'Lower Highlights' and place it higher up the 'Skin Base' layer. Adjacent create a gradient with white at the 0% location on the slider and the skin base of operations blue at the100% location. At present add together a slider around the 75% betoken and swatch this color, and utilise it to draw the lower highlights.
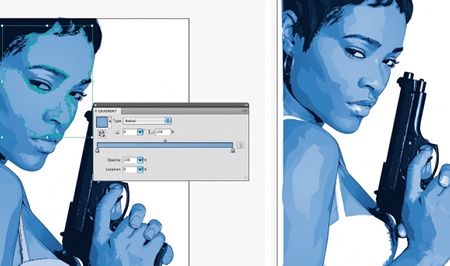
09 Brand a Radial Gradient with the lower highlights colour at the 0% location and the skin base of operations colour at the 100% location. Afterwards, make the 100% colour slightly lighter, and the 0% location darker until you go an accurate gradient. Apply this to all of your 'Lower Highlights' shapes. Repeat this process for 'Medium Highlights' and 'Highlights'. Place the 'Highlights' layer at the height.

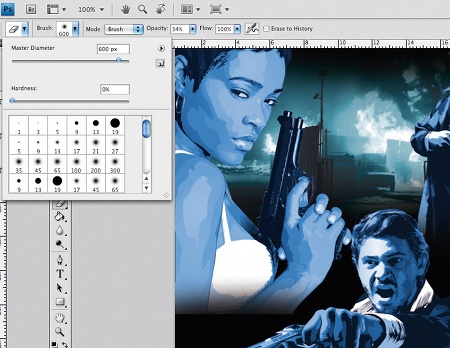
10 One time your characters are drawn, leap back over to Photoshop, create a new A3 CMYK file and use the Pigment Bucket tool to make full a new layer with black. Later that, open up all your characters and drag them in on split up layers. Position them as per your earlier limerick. Select the Eraser tool and set it to Brush mode, with the Size at around 600 pixels, Hardness at 0% and Opacity at around 35%.
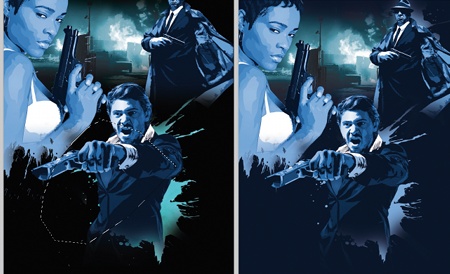
xi Now use the Eraser tool to fade out the characters. Be sure to duplicate each of them before yous begin editing. Do the aforementioned with the background image and place it higher up the black background. Striking Ctrl/Cmd+U to bring up the Hue/ Saturation palette. Click the Colorize tab and gear up the Hue to 170 and the Saturation to 42.
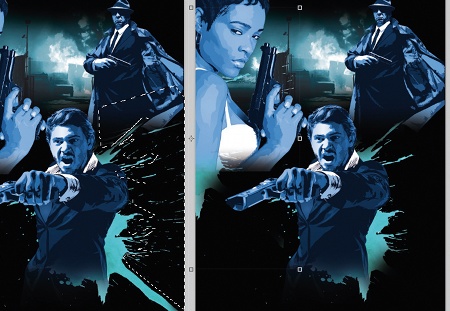
12 I used splatters to add energy to the limerick - www.cgtextures.com have some corking ones, but I've used my own. Identify your splatter behind your character and apply the Eraser and Marquee tools to go rid of whatever unwanted bits. Now indistinguishable the splatter layer and position information technology so information technology sits above the female character.
13 Open the Styles palette by double-clicking the layer, then click the Color Overlay tab and apply the Eyedropper to make information technology the same colour as the graphic symbol's skin. Indistinguishable the layer again and rotate the splatter until y'all get an interesting shape, then utilise the Lasso tool to create a smooth edge. Follow the same theme with any other characters, and change your groundwork colour to the darkest blue used on the vectors.
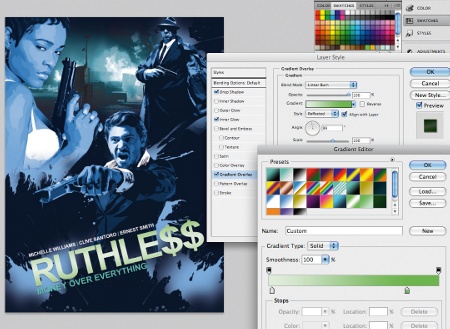
xiv Add some more splatters and a piece of rotated text to increase the energy of the poster. I added some Layer Styles; a Linear Gradient with the Blend mode set to Linear Burn (also set to a slight angle), an Inner Glow and a Drop Shadow. Conform the settings of the styles y'all applied until yous achieve a effect that enhances the overall look of the text.
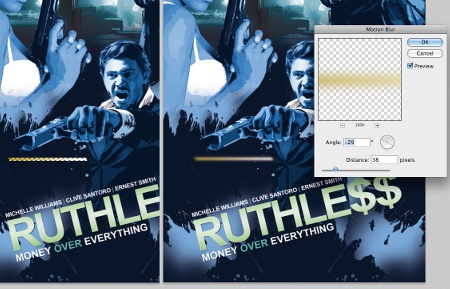
15 Create a new layer and utilise the rectangle Marquee tool to draw a thin rectangle, then fill information technology with a yellow and white gradient. Deselect the shape (Ctrl/Cmd+D) and apply a Gaussian Blur of 8.9 pixels radius followed by a Motility Blur angled at -29 and the distance set to 38 pixels. I ready the layer Alloy mode to Colour Dodge and rotate information technology to the same bending as my character's gun.
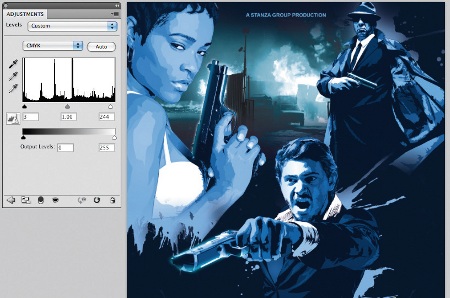
16 Use the Eraser tool at a Hardness of 50% and Opacity of most 35% to tidy upwardly the light strips. I repeat this process for the other side of the gun and for the other characters. Make whatever compositional adjustments needed then finally raise the analogy'southward color by calculation a Levels Aligning Layer (Layer>New Adjustment Layer>Levels) placed at the top of your layers palette.
Simeon Elson
Simeon is an illustrator and graphic artist. Over the past 5 years he has produced designs for flyers, books, apparel, websites, branding and magazine editorial. His Clients include: Grazia, Whorrell Rogers blueprint consultancy, Touch magazine and Penguin Books. www.simeonelson.co.great britain

Cheers for reading five articles this month* Join at present for unlimited access
Enjoy your first month for just £i / $i / €1
*Read 5 gratis articles per calendar month without a subscription
Bring together now for unlimited admission
Attempt get-go month for just £i / $1 / €i
Related articles
Source: https://www.creativebloq.com/computer-arts/plot-your-pictures-2118697
0 Response to "What Is the Plot of the Hobbit There and Back Again"
Post a Comment